By Juan Almeida, Senior Consultant, Data Analytics & AI

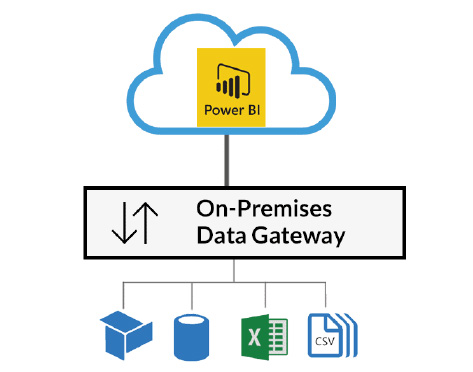
Download, Install, & Configure a Power BI Gateway
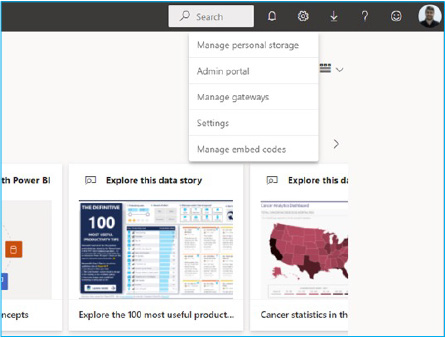
To download the last version of the gateway, login into Power BI Service, click on download options then “Data gateway.”
Getting Started
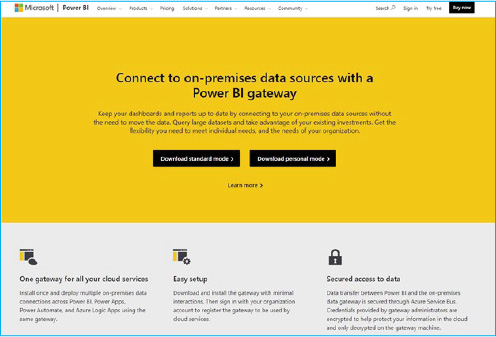
To download the latest version of the gateway, login to Power BI Service and click on “Download Options.” Choose “Data gateway.”

This will redirect you to the official website of Power BI.
Download the mode you need.
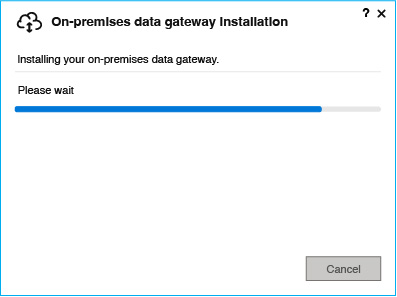
Once downloaded, you can, as an Administrator, execute the installer.
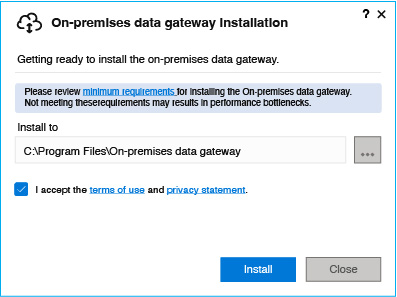
Choose the installation folder and accept the terms of use and privacy statement.
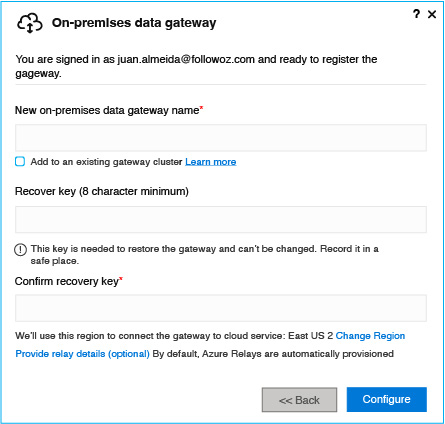
Input your credentials. (The gateway will be associated with this user.)

In the next step, you can choose whether to create a new gateway—the same user can create more than one in different machines—or migrate/restore or takeover an existing gateway.

If you are creating a new gateway, set a name and a recovery key. (This is in case you need to restore.).
By default, the gateway is created in the East US2 region, but you can change it if necessary.
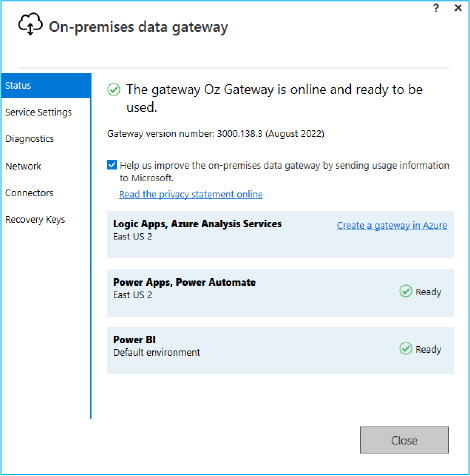
After completing the configuration, the gateway is ready.
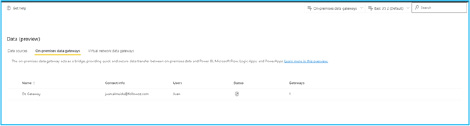
To set up the gateway in the cloud, return to Power BI Service, go to the configuration icon, and click “Manage gateways.”
Here you will see the recently configured gateway.
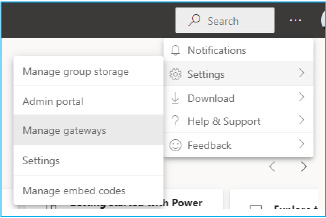
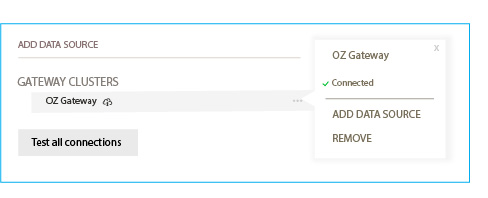
To configure a new connection, go to settings and click “Manage gateways.”
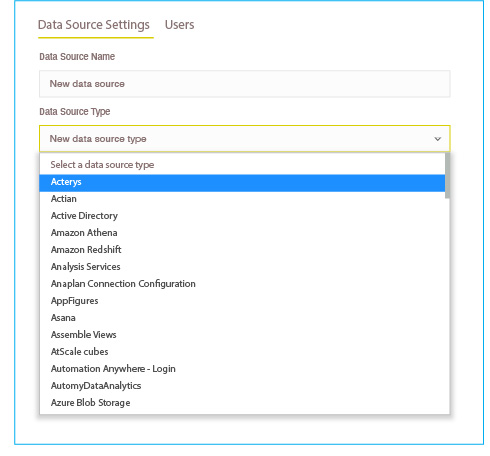
Visit “Data sources” and click “+ New” at the top.

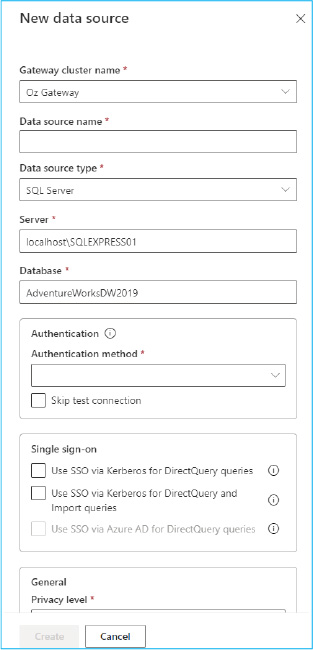
A form will appear on the right to complete the new connection.
Select the gateway where you are creating the connection then the name of that connection and the data source type.
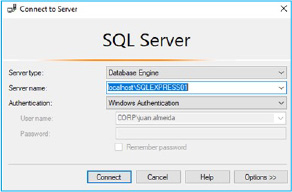
In this case, we are creating an SQL Server connection so it’s necessary to give the server, database, and authentication.
Here we will use our local SQL Server and the AdventureWorksDW2019 database, including the same details in the gateway connections configuration.
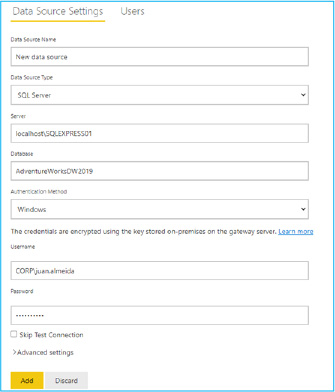
After configuring the connection, either test it before creation (default) or just create it and, in case the connection doesn’t exist at that moment, test it.
Look for a “connection successful” message.
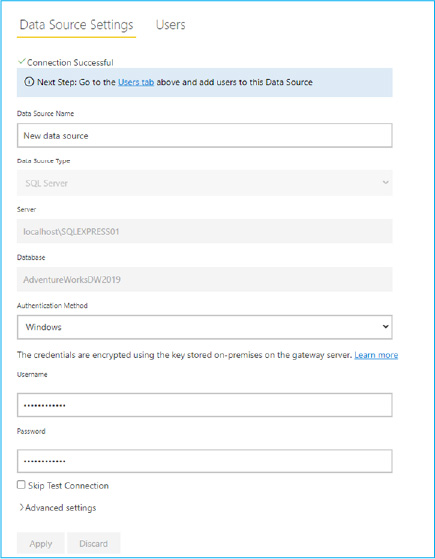
Refresh your dataset and create a scheduled refresh.
Create a new connection based on an existing report
If you publish a report without a gateway connection created, it is necessary to return to the workspace where that report was published. Click on the three dots and choose “Settings.”
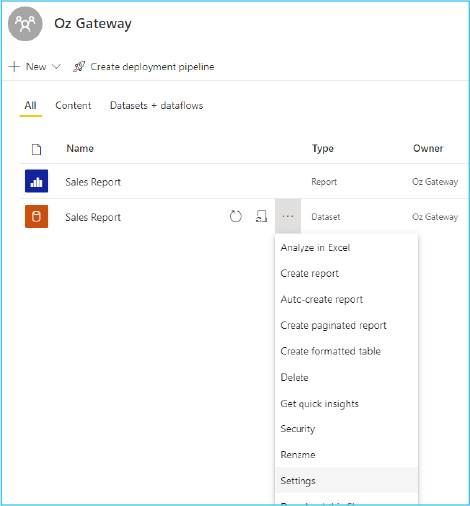
Click the “Gateway connection” tab.
In this case there is a status message which indicates we must create a gateway connection for this report.
In “Actions” there are two icons.
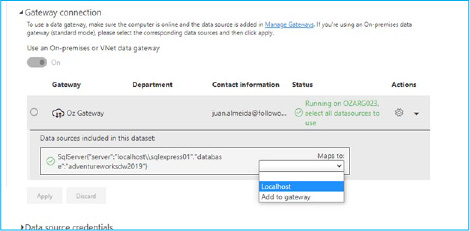
The first is “Manage Gateways”—click here to create a gateway as above. The other is “View Data sources.” If there are no data sources created, click “Add to gateway.”
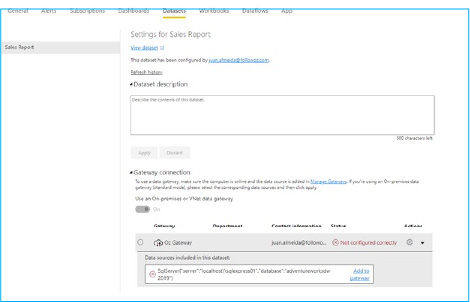
This is faster than the earlier choice because the connection is pre-defined. Simply complete the name for this connection and the authentication.
After the connection is created, return to the dataset settings again to map the connection to the report and refresh it.
Create a scheduled refresh
For a scheduled refresh, it is necessary to be in the workspace of the report.
Click on the “Schedule” icon in the Dataset field.
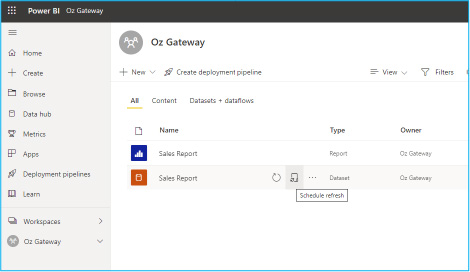
Go to the “Scheduled refresh” tab.
Set as “On.”
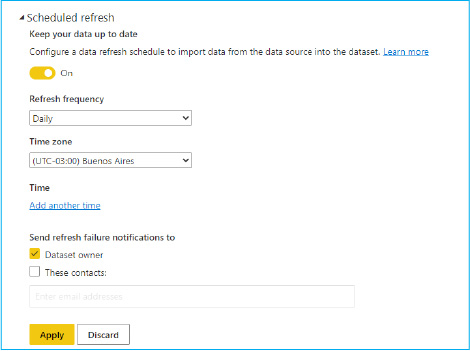
Define the frequency, time zone, and add the moments you want that report to begin the refresh.
For the last item, you need to click “Add another time” and set the moment that the report will be refreshed.
At the end, you can define the users that will be notified if the refresh fails.
Finished!
Ready to optimize and supercharge your processes across the board? Click here to find out what OZ can do for you.
Regardless of where you are on your digital transformation journey, OZ experts will put our twenty-five years of experience to work for your organization, helping you to streamline processes, save money, increase scalability, gain competitive advantage, and improve business efficiency and operations. Find out more about our services here.